Getting some answers about type cutting
Beside the wonderful immersion into wood type during my recent trip to the Wayzgoose at Two River, I also had a year’s worth of wood type cutting questions for the wood type experts who would be there.
Trying to become a wood type cutter, trimmer, finisher, designer, and type high maple producer has been a very big learning curve. Every new process has to be recreated from an industry that has not existed for 60 years. There are still a few people left in Two Rivers who used to work for Hamilton that the Museum calls on for demonstrations and answers. I was determined to get the eight questions I had in my Moore Wood Type notebook answered before Sunday and the trip home.

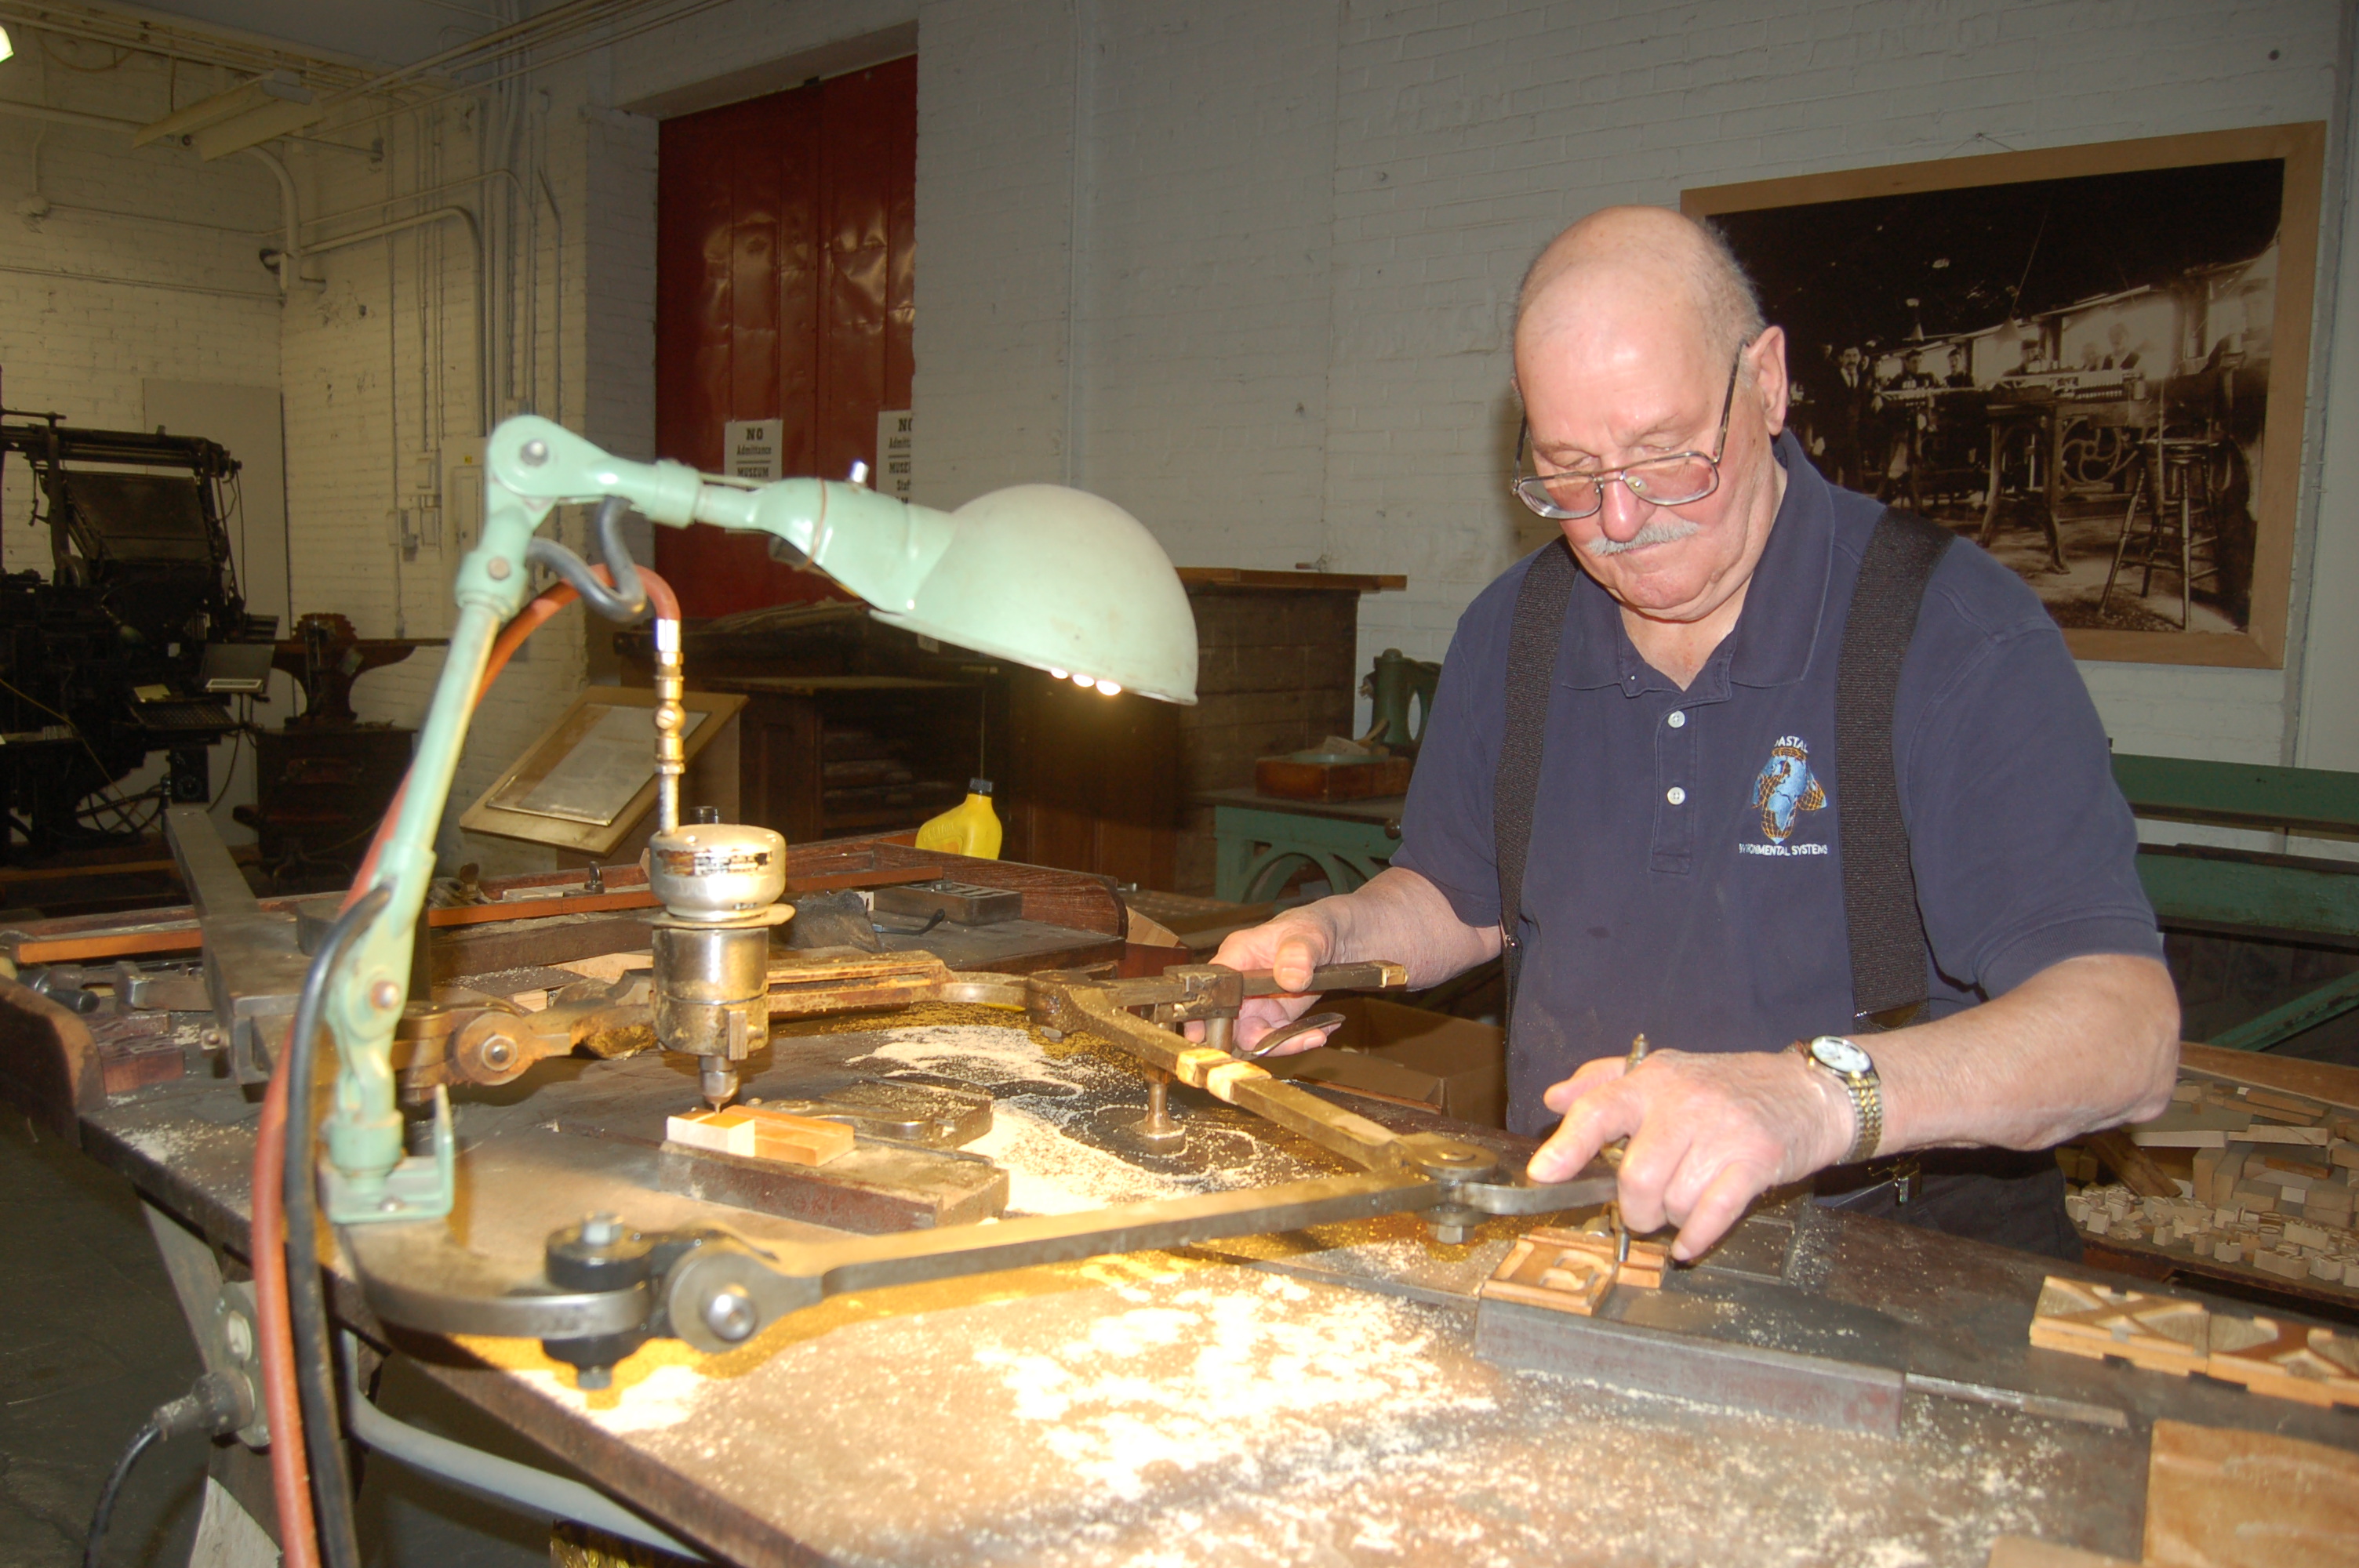
(L to R) Greg Walters, Don Black, and Rick von Holdt
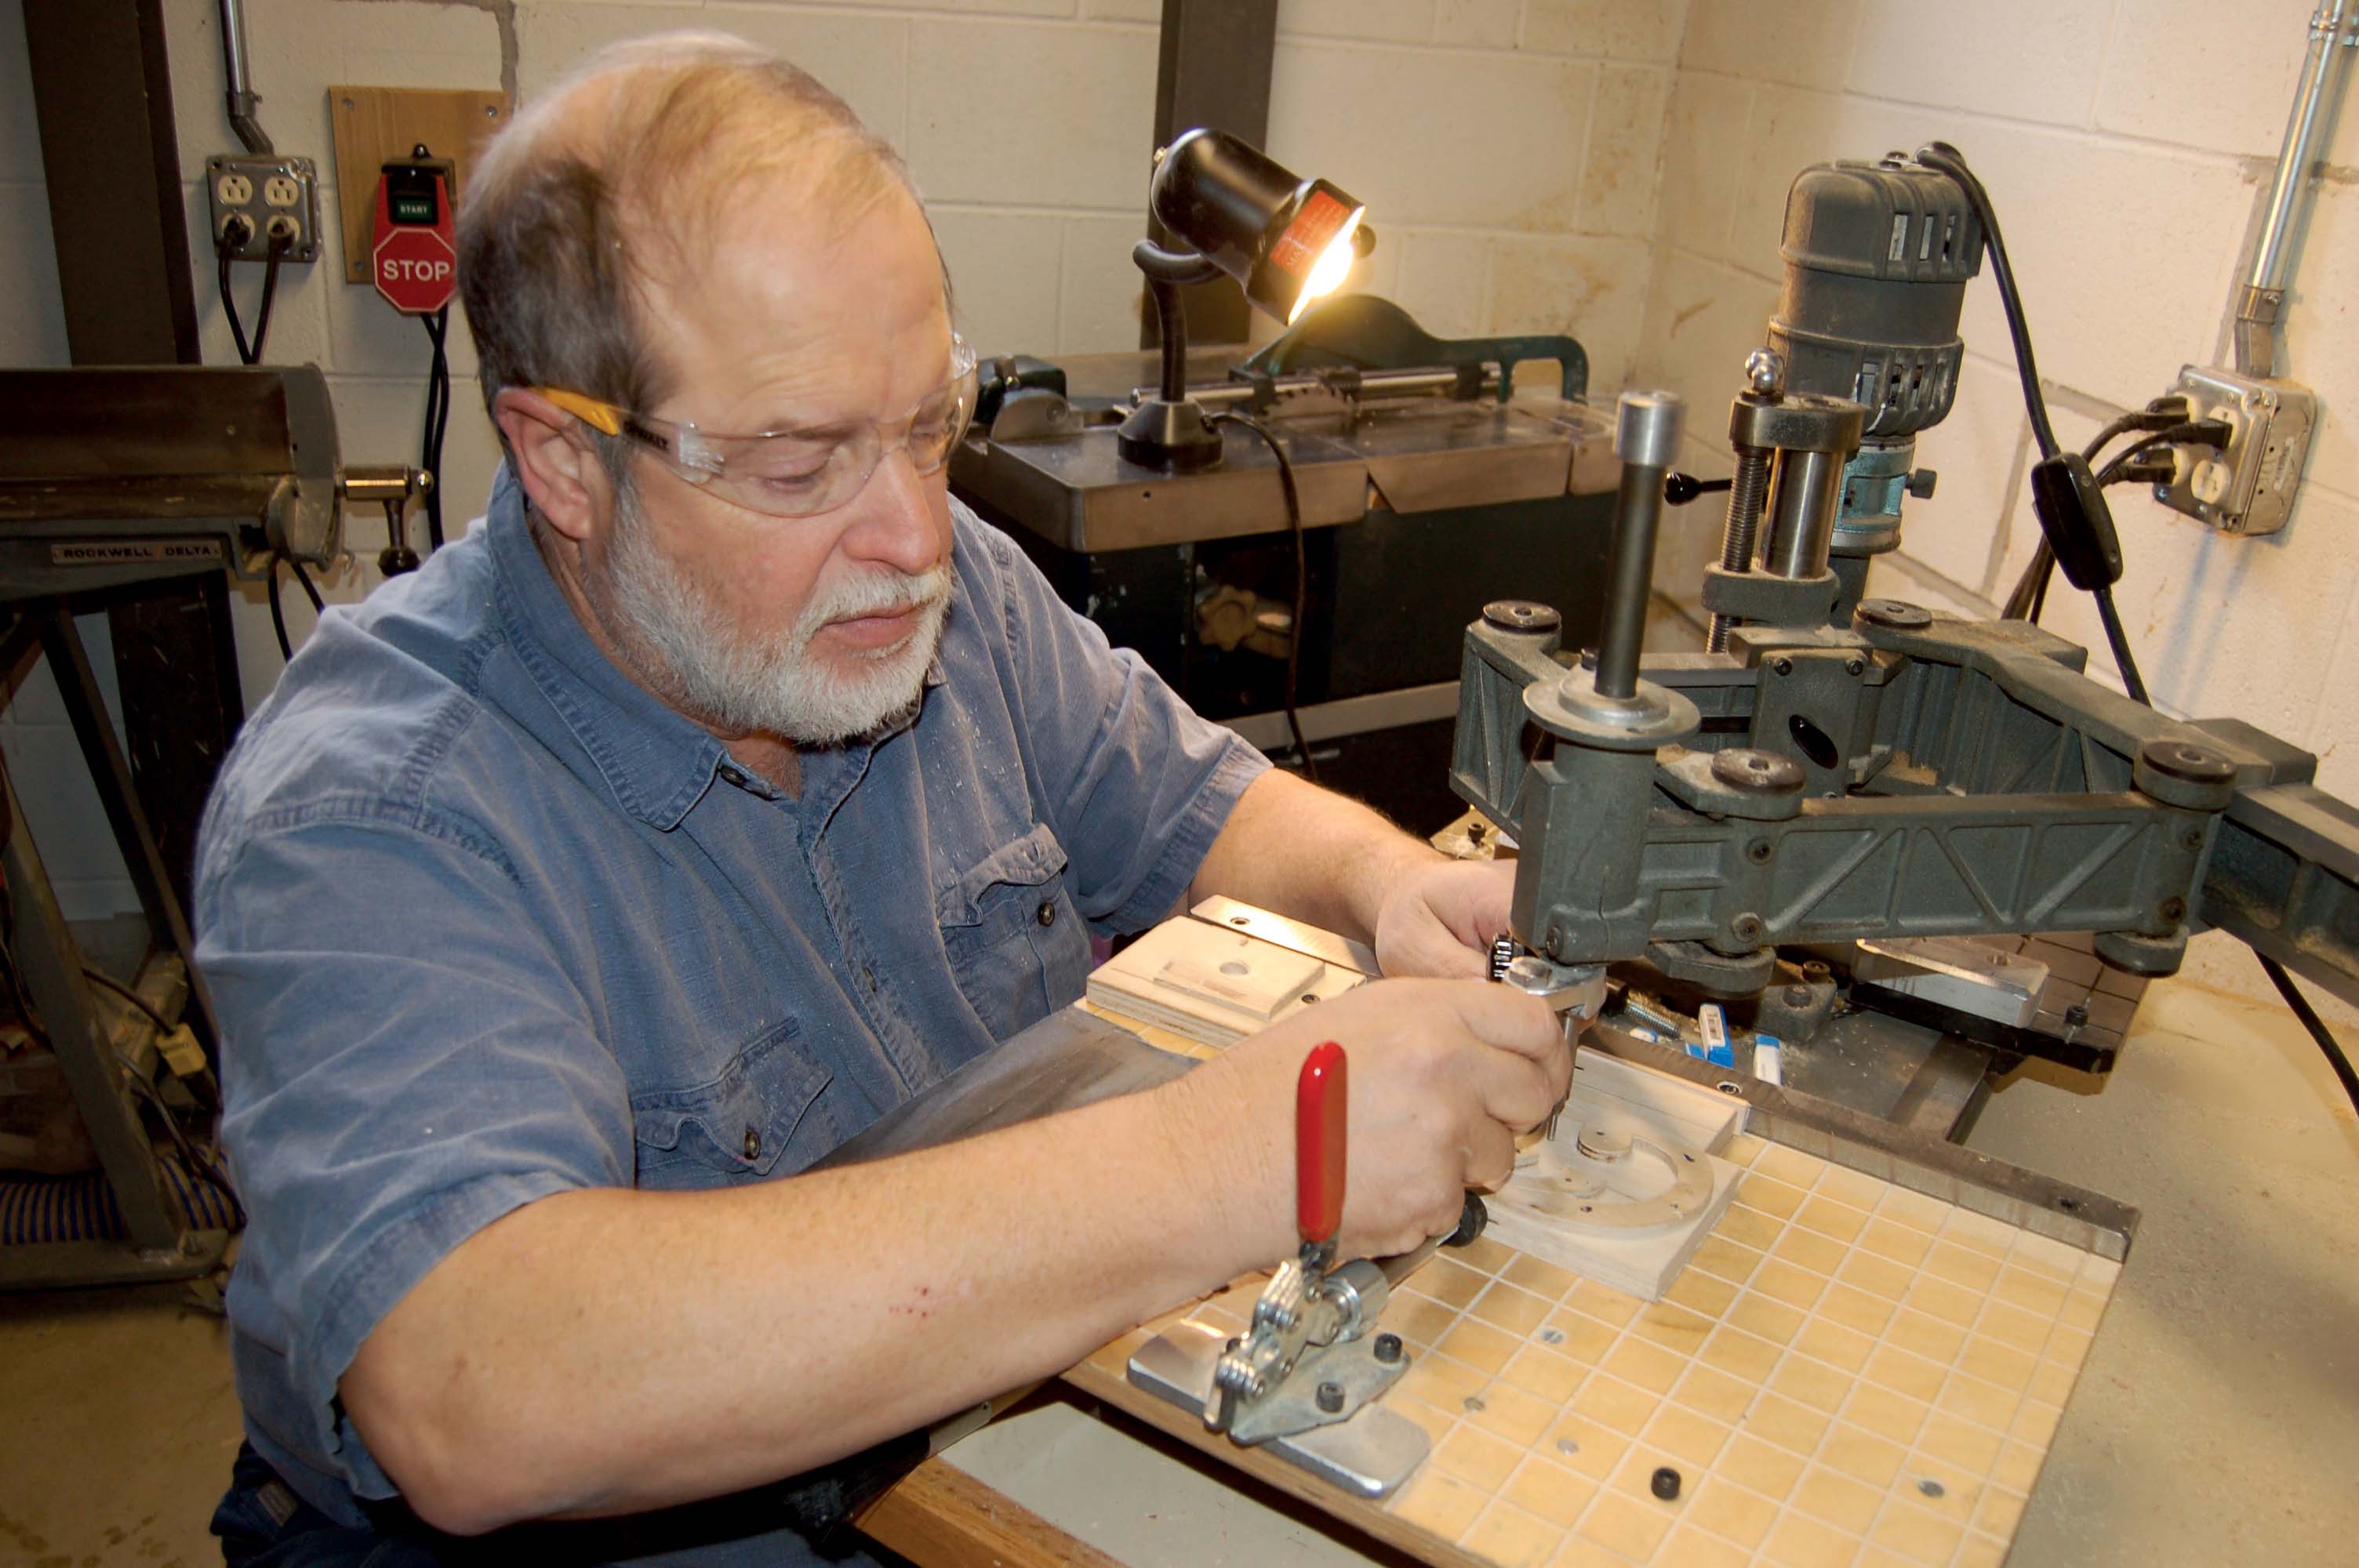
We arrived early in the day Thursday and the museum was still open to the public as the staff and volunteers prepared for the Wayzgoose that started on Friday. Both Erin and Don Black went off to meet old friends. I went to the type cutting pantograph area where Norb was giving a lesson to a new staff member.

I cut a practice catchword with lots of edge chips to show how cutting the wrong direction on an edge can leave chips for this site. (The actual historic catchwords I am selling do not have this problem.)
For the next half hour Norb answered my type cutting questions and demonstrated, in slow motion, some type trimming techniques. We discussed why he traced a type pattern in a certain way. Why he back-cut the corners of both edges of a serif letter first, to avoid making a chip in the shoulder edge. I learned why he holds a trimming knife in a certain way in his hand, and he corrected three things I thought I knew about trimming type. Skills that he had learned long ago. We even discussed how to use a “shooting board” to put a very small bevel on the edge of a type block that does not get cut with the pantograph (like the right side of a reversed upper case R or the top of an upper case T)

A small end grain maple burr can be avoided once you determine the tracing pattern and direction. Norb's cutting rules, and I am up to 8 so far, states to "Follow the shape of the letter first", being sure to cut from left to right on the edge being cut.
I asked Norb what they called the little pointed areas on a piece of type shoulder that a type cutter might miss when he was cleaning off this wide flat area.
Type designer and expert, Nick Sherman, and I had decided it was called a “Burr,” which is defined as “A rough edge or ridge left on an object (esp. of metal) by the action of a tool or machine.” An end grain hard maple point, even as small as 1/32” can not be broken off with your finger. It takes a steel cutter or trimming knife. As an Industrial Arts teacher I can state that an end grain maple burr is almost as hard as a burr on a piece of steel.
Norb liked this term for these little pointy mistakes. He explained that if a type cutter left any of these “burrs”, it was the type trimmer’s job to fix them. He also stressed that if the pantograph operator made too many of these mistakes, he would not be cutting type for very long.